- TDM redirects here. For other TDM-style game modes, see Escalation or Snowball Fight.
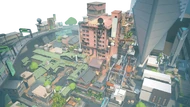
Team Deathmatch is a TDM-style game mode in VALORANT where two teams fight on a small map to get the most kills using a variety of weapons and their agents' abilities.
Summary[]
Team Deathmatch is a 5v5 game mode where players select their agent before going into game. Team Deathmatch has a 20-second pre-game phase and four main stages. Teams begin the match in their side's spawn room. Whilst inside the spawn room, both during pre-game and during the match, players can access their weapon loadout and modify which weapons they'll receive at each stage. Stage 1 is a sidearm-only stage, but for subsequent stages players will carry both their primary weapon of choice for that stage as well as their sidearm of choice for Stage 1.
Team Deathmatches are split into four stages; the first three stages are 75 seconds (1m 15s) each, and Stage 4 is 345 seconds (5m 45s). Each Stage changes the selection of guns players are allowed to take, as well as the weapons that spawn from weapon spawners. When a new stage begins, players will be prompted to switch to their next weapon, and will be forced to equip it after a short duration. Upon being killed, players will respawn 1.5 seconds later in their team's spawn room. Whilst remaining in the spawn room, they will be kept invulnerable for 15 seconds but after this they will start to take damage from staying in the room.
Players have immediate access to their basic and signature abilities and spent charges will recharge over time, with recharge rates varying depending on the ability. Players gain access to their ultimate by charging it up with points gained from kills (3 points) or collecting Ultimate Orbs (10 points). Some agents need more points than others to charge their ultimate, however the differences in agents' ult costs for Team Deathmatch are not relative to the differences agents have with their ult costs in standard play.
Once a team reaches 100 kills, they will win the match. If the match reaches the end of Stage 4 without either team reaching 100 kills, the team with the most kills will be declared the winner. If both teams are tied on kills instead, the match is declared a draw.
Loadout[]
Each player carries a melee, a sidearm based on their Stage 1 choice, and, after Stage 1, a primary weapon based on the current stage and the player's weapon of choice for that stage. The amount of shields a player has each stage depends on the gun they have chosen for that stage. All weapons from standard loadout have standard ammo and infinite magazines.
| Stage 1 |
|---|
 Classic |
 Frenzy No Shields |
Ghost No Shields |
| Stage 2 |
|---|
 Sheriff |
 Stinger |
Ares |
| Stage 3 |
|---|
 Spectre |
Ares |
 Bulldog |
Guardian |
| Stage 4 |
|---|
 Phantom |
 Vandal |
Weapon spawners[]
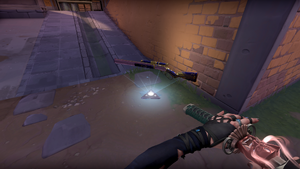
A weapon spawner, spawning Marshal, in Piazza
Guns can also be picked up from weapon spawners located around the map. The guns available at these spawners change depending on the current stage. In the event of stage change upon using a weapon from the spawner, the player can choose to change to the stage change's gun or stick to the current gun picked up from the spawner. Players can return to their chosen loadout by dropping the gun (which in this case can no longer be picked back up) or by depleting all bullets from the gun they picked up. Unlike the standard loadout, most of these guns have standard ammo (with the exception of Odin), but lesser reserves than usual compared to standard gameplay.
| Stage 1 |
|---|
Shorty |
 Sheriff |
 Stinger |
| Stage 2 |
|---|
Bucky |
 Spectre |
 Bulldog |
Marshal |
| Stage 3 |
|---|
 Judge |
 Phantom |
 Vandal |
Outlaw |
| Stage 4 |
|---|
 Judge |
 Operator |
 Odin |
Abilities[]
Most agents start the match with one full charge of their signature ability (plus 50% progress on the next charge if their signature has more than one charge available) and 50% progress towards the first charge of their basic abilities. ![]() Astra gains two full charges of her
Astra gains two full charges of her ![]() Stars instead.
Stars instead.
After casting abilities, they will recharge over time, with recharge rates varying depending on the type of ability. Abilities that can be recalled in combat go on cooldown for 5 seconds when recalled. ![]() Astra's
Astra's ![]() Stars will go on a 20-second cooldown if
Stars will go on a 20-second cooldown if ![]() Dissipated.
Dissipated. ![]() Gekko's Globule abilities will go on a 3-second cooldown if successfully reclaimed.
Gekko's Globule abilities will go on a 3-second cooldown if successfully reclaimed.
Players gain access to their ultimate by charging it up with points gained from kills (3 points) or collecting Ultimate Orbs (10 points). Some agents need more points than others to charge their ultimate, however the differences in agents' ult costs for Team Deathmatch are not relative to the differences agents have with their ult costs in standard play.
| Ultimate Cost for Agents in TDM | ||
|---|---|---|
| Agent | Ultimate Ability | Ultimate Cost (points) |
| 90 | ||
| 80 | ||
| 80 | ||
| 70 | ||
| 70 | ||
| 50 | ||
| 60 | ||
| 80 | ||
| 70 | ||
| 90 | ||
| 60 | ||
| 60 | ||
| 70 | ||
| 80 | ||
| 60 | ||
| 60 | ||
| 70 | ||
| 80 | ||
| 80 | ||
| 50 | ||
| 70 | ||
| 70 | ||
| 90 | ||
| 60 | ||
Orbs[]
Each map contains several orbs that players can run over to gain their effects for themselves and their team by generating a zone that allies can enter to also receive its effects. Team Deathmatch has two types of orbs:
 Recovery Orbs: Grants a 6-second buff that restores Health and, depending on the player's loadout, shields
- Each Recovery Orb respawns every 30 seconds
 Ultimate Orbs: Grants 10 points towards the player's ultimate charge
- All Ultimate Orbs spawn onto the map together periodically
Maps[]
- Main article: Maps → Team Deathmatch
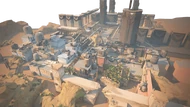
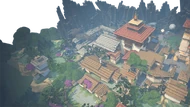
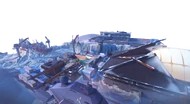
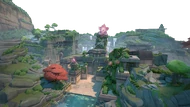
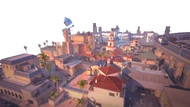
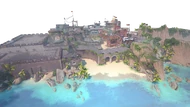
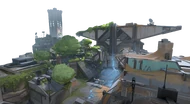
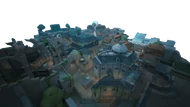
Team Deathmatch is played on maps created specifically for the mode. Max Bot himself is used as the game mode's announcer and has a visible presence in the maps' spawn rooms.
Update History[]

 Fixed a bug where, if the Outlaw was picked up from a weapon spawner, it had no reserve ammunition.
![]() Added
Added
Gallery[]
| In rotation | ||||
|---|---|---|---|---|
| Unavailable | ||||
| Others | Custom Game • New Map • Practice Game Modes | |||
| Standard | In rotation: | |||
|---|---|---|---|---|
| Excluded: | ||||
| Map rotation only applicable to Competitive, Premier and Deathmatch. Read here for more details. | ||||
| Other | Team Deathmatch maps • The Range (Lore) | |||


