Heading out the door? Read this article on the new Outside+ app available now on iOS devices for members! Download the app.
We’ll admit, when we first conceptualized the “Master Class” series for Oxygen, we debated whether we should even bother to include the classic bench press. After all, we’ve heard from women time and again that they tend to avoid this particular exercise, with reasons ranging from the aesthetic — the fact it targets the pecs, which aren’t really all that visible anyway on a female physique — to the simple fact that bigger breasts can complicate the range of motion.
Add to that the difficulty of getting a bench press station during the busiest times of the day in the gym, and it stands to reason why benching just isn’t held in high regard by our readers. Still, though, we think that’s a mistake — and it’s why we ultimately relented and gave the bench the in-depth feature treatment it deserves.
The bench press is one of the most effective exercises in existence for shaping, toning and building up the pectorals. And sure, while much of that hard work may be hidden under breast tissue, that muscle does serve a grand purpose in, well, keeping that area tight and lifted to a certain extent. The chest also contributes to better posture and helps balance your whole upper body, both functionally and visually.
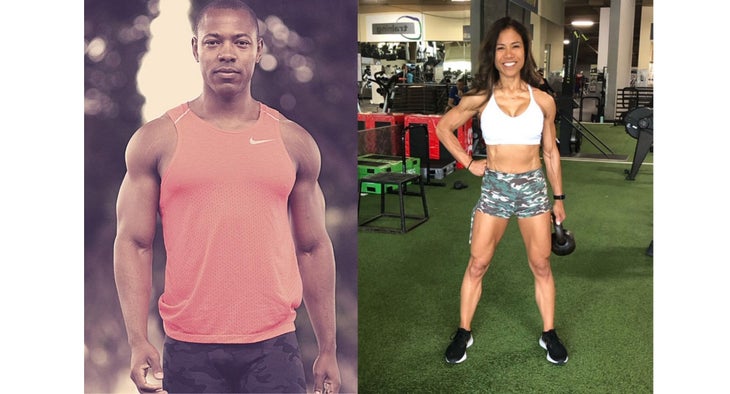
The following tips, created with the help of two top California-based experts, Ridgid Fitness owner Ridge Davis and certified personal trainer and Registered Yoga Teacher Darlene Kalina Salvador — will help you get everything you can out of this underappreciated move.
5 Steps to the Perfect Bench Press
From how to position your body in relation to the barbell, through the lift to full elbow extension and back down again, here’s what you need to know to bench like a champ.
1. The Set-Up
First and foremost, you’ll want to recruit a spotter who can monitor and help you throughout the lift, from guiding the barbell into position out of the rack to keeping both hands at the ready underneath the bar as you raise and lower the weight.
Next, you’ll place an Olympic barbell in the racks of a flat bench press station and load the appropriate warm-up starting weight. This can be the bar itself, which is usually 45 pounds, or if you’re not yet strong enough to handle the Olympic bar, you can use a pre-loaded barbell and a standard adjustable flat bench instead (still with a spotter at the ready, however).
Trainer Cue: Eye Level
“For an idea of proper positioning, I suggest lying faceup on the bench with the bar right above your eyes while bar is racked,” says Davis.
2. A Solid Foundation
Lie back on the bench with your feet flat on the floor, your upper body in contact with the bench from your head and shoulders to your hips — except for your lumbar area, which will be elevated off the bench. “You’ll create an arch in your back by placing your feet on the floor and lifting your hips high,” Salvador instructs. “To create more of an arch, lift the heels of your feet to go onto your toes, but keep in mind that the arch does not need to be excessive.”
Grasp the bar with both hands, lining them up by finding the grooved circles around the barbell — they tend to be roughly lined up with the shoulders and equidistant away from the sleeves on each end. Make sure the same finger is aligned around that circle, whether it’s the pinkie, index or pointer. (Basically, aim for a grip “one inch wider than shoulder width,” Davis suggests.)
Grip the bar tightly, wrapping your thumbs fully around so they are in contact with your palm on the other side. Your hands should be at shoulder width or slightly outside.
Pro Tip: “Keep in mind that a wider grip will put more emphasis on the chest and shoulders, but also contributes to more stress on the shoulder joint,” says Salvador. “A narrower grip will engage more of the triceps (think Chaturanga for all you yogis), which is a primary mover in the barbell bench press. Stronger and more developed triceps muscles contribute greatly to a stronger press.”
3. Ready for Reps
Push your feet solidly into the floor for support, and with your spotter holding onto the bar from overhead with both hands, lift the bar from the supports. It should be directly over your middle pectorals, elbows extended but not locked, grip remaining firm on the bar. Your spotter should continue to grasp the bar until you give an all-clear signal (such as a nod and the word “ready”) when you are all set to begin the first rep.
Crew Cue: On the Rebound
“As a yoga instructor, I am constantly instructing poses from the ground up to help create steadiness, energy and power,” Salvador says. “Lifting weights is no different — by connecting to the earth, we can start to feel a sense of support and stability. For a chest press, I’ll cue clients to push their feet into the ground and feel the rebounding energy move up their body and into their chest and arms as they push the bar off the rack.”
Error Alert: To create a strong foundation for the lift, retract your shoulders by actively drawing your shoulder blades back and down and tense your latissimus dorsi muscles along each side of your back. “A common mistake to avoid is a lack of lat engagement,” Davis explains. “When the shoulders aren’t stabilized by your lats, it causes the anterior shoulders (i.e., the front delt head) and traps to overwork and leads to a higher risk of injury.”
4. Address the Press
Take deep breath in and lower the barbell straight down, under control, by bending your elbows until it touches down lightly right around the middle of your chest. Pause a beat at the bottom, then flex your pecs and triceps to explosively press the bar back upward, breathing out as you do so, to the point your elbows are straight but not locked out. In the top position, your arms should be in a perpendicular plane to the floor and your wrists aligned directly under the bar.
Continue pressing up and slowly lowering the bar back down to your chest, pausing for a moment at the bottom and top of each rep to eliminate momentum from the lift.
Trainer Cue: Just Breathe
“When you take that initial deep breath in, expand your abdominals and chest,” Salvador says. “To me, it helps to picture your breath moving 360 degrees around your entire torso through your chest, back and core.”
Error Alert: “Be aware of not excessively flaring out your elbows in the bottom range of the movement,” Salvador cautions. “Although flaring out the elbows can provide some power, doing so isolates the chest muscle and does not recruit the other primary movers of the press, the triceps and shoulders. Recruitment of the other primary movers will lead to a better chest press and help you avoid injuries such as shoulder impingement or rotator cuff tears.”
Pro Tip: The path of the bar will dictate the muscles you’re targeting. “Most people bench press with a goal to develop a stronger chest,” Davis says. “But if your bar path is too much over the shoulders and not the chest, the shoulders and triceps take over and the chest won’t be as active during the press.”
5. Safety First
Depending on your comfort level with the weight, your spotter should be directly behind your head at the end of the bench, either with his/her palms directly below the barbell throughout the ascent and descent, or at the ready to help you if you reach a point of failure. After you’ve completed your target number of reps, your spotter should take hold of the barbell with both hands (inside your grip) and help you guide it back into the supports.
Pro Tip: “While you’re slowly lowering the bar, your elbows should be positioned about 45 degrees away from your torso,” Ridge says. This helps target the pecs, while tucking your elbows in closer means your triceps are taking on more of the load — if you find yourself shifting, it may mean stronger tri’s are overcompensating for a weaker chest. (If that’s the case, consider adding a few of the “5 Moves for a Better Bench,” below, to your regular upper-body workouts.)
Crew Cue: The ‘Breaking’ Point
“Yes, it’s technically not possible to do so, but think about ‘breaking or bending’ the bar as you press,” Salvador suggests. “This subtle cue will help you keep your elbows away from your body — while also not flaring them excessively — and maintain tension on the working muscle groups.”
Error Alert: “Do not bounce the bar off your chest,” Salvador says. “Using momentum and bouncing the bar takes away from working the pectorals, which completely defeats the purpose in a chest press. More importantly, bouncing the bar can lead to a cracked rib, sternum or more serious injuries.”
5 Moves for a Better Bench
These five ancillary exercises can help improve your strength, stamina and performance in your quest to master the bench:
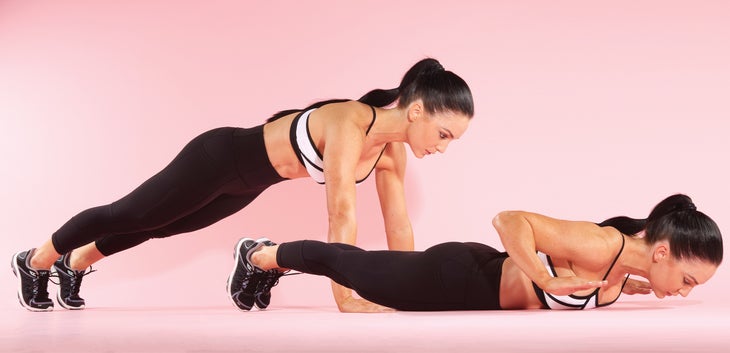
1. Dead-Stop Push-Up
“Before introducing the barbell chest press to clients, I will almost always assess their strength and form by having them do a dead-stop push-up,” Salvador says. “This has the added benefit of teaching them which muscles need to be activated during a press — the pecs, triceps and shoulders. It also teaches them how to engage and brace the core.”
How-To: In a plank position, place your feet together, toes on the floor, with your hands wider than shoulder-width and flat on the floor and your elbows extended. Keeping your head neutral and abs tight, lower yourself by bending your elbows until your chest touches down to the floor. Lift your hands off the floor for a moment, then place them back down and press through your palms until your elbows are straight once again and you’ve reached the top of the push-up.
2. Standing Cable Shoulder External Rotation
The rotator cuff muscles in the shoulder complex are a critical component of any pressing moves, Davis says — but being small muscles, they are prone to injury if not warmed up. This movement is a great way to generate blood flow to the area and gets the rotator cuffs engaged and ready for heavier presses to come.
How-To: Adjust a cable station so the cable is at chest level, with a D-handle attached. Stand sideways to the weight stack in a shoulder-width stance, holding the handle in your outside hand, that elbow tucked directly to the side of your torso with the arm bent to 90 degrees. Your free arm can be on your hips or on the machine’s frame for support. With your bent elbow remaining in contact with your body throughout, torso upright and stable, pull the handle from a point of contact with your lower right ribcage all the way across your body as far as you can go. Your upper arm should remain locked at 90 degrees, so that the only movement is the rotation at your shoulders. Because the rotator cuffs are smaller muscles, you’ll want to keep the weight on this exercise very light — if you find that you’re twisting or contorting your body during the pull, it’s too heavy.
3. Single-Arm Cable Press
“Like the dead-stop push-up, the single-arm cable press also teaches you how to create stability and recruit the primary muscles,” Salvador explains. “Being a unilateral move, it can help identify if there are any imbalances between the left and the right side of the body, too.”
How-To: Adjust the cable station to the same start position as the external rotation described above — the cable at chest level with a D-handle attached. Face away from the weight stack in a staggered stance, holding the handle in the same hand as your back leg. Your working arm should be fully bent, palm down and even with your armpit to begin. Hold your free arm out in front of you. From here, extend your bent arm straight forward by flexing your pecs, like a punching motion. Your shoulder will shift forward as you do so, while you also bring your free arm back behind you as you bend that elbow, working as a counterbalance. Return slowly to the start, without letting the weight stack touch down between reps. Complete 8-10 reps for one side, then switch to the other hand and repeat.
4. Banded Lat Pullover
“When benching, I tell people that when bar is coming down, imagine like you’re doing a slow row, engaging the lats and backside of the body,” Davis says. The pullover with a band — which keeps constant tension on the lats throughout the range of motion — is a helpful tool to teach the idea of maintaining tension in your lats during a set.
How-To: Attach a band to a low, sturdy object, such as a pole or bench, and lie with your head toward the anchor point. Your back and head should be on the floor, knees bent and feet flat. Hold one end of the band in each hand, arms extended and angled back toward the anchor point. From here, flex your lats to slowly bring your arms up until they are extended directly above your chest, hold the full contraction for a one-count, then lower your arms back to the starting point.
5. Banded Reach Up and Overs
“I recommend this move as chest opener and shoulder mobility drill,” Davis says.
How-To: Grasp an end of a band in each hand, arms straight and down, angled out so that your hands are well outside shoulder width, with the band held taut across the front of your hips. From here, keeping the band taut, lift both arms up in an arc simultaneously until they are directly overhead and then back down behind you until the band comes down and touches your glutes. Smoothly return along the same path.
Anatomy of a Bench Press
What major muscles are involved in the bench? Here’s the breakdown:
Pectoralis Major: This large, fan-shaped muscle runs from the middle of the ribcage, across the chest under the breast tissue, and attaches to the humerus bone in the upper arm. It is the prime mover in the bench press, bringing the upper arms to the front of the body to press the weight upward.
Pectoralis Minor: This small, triangular muscle lies underneath the pectoralis major; it helps stabilize the ribcage and is involved in deep breathing.
Anterior Deltoids: The front heads of your three-headed deltoid muscles (i.e., your shoulders) engage as you bring the barbell up toward the apex of a rep.
Triceps: The triceps, made up of three heads, works as a secondary mover in all pressing movements; a closer grip on the bar, inside shoulder width, tends to accentuate the role of the tri’s in benching, while a wider grip (shoulder-width or wider) stimulates more of the pectoralis major.
Erector spinae: This pair of lower back muscles run up your back on either side of your spine, helping stabilize it by flexing isometrically in concert with your abdominals to hold your upper body steady on the bench.
Latissimus Dorsi: The widest muscle of the body, these muscles attach at the spine and fan out toward the outer edge of your back — they serve a stabilizing role during the bench.
Trapezius: The large triangular muscle between your shoulders at your neck that runs down the center of your back, the traps stabilize your scapula (shoulder blades) during the press.
Trainer Q&A
Do women tend to have benching form issues unique from men? If so, explain.
Salvador: “One issue I see with women is failing to complete the movement with full range of motion, especially at the bottom. The common mistake is to load the bar with too much weight and only bring the bar halfway down.”
Davis: “Women typically have narrower shoulders and longer arms than men, so that means that they’ll have to adjust their arm placement a little wider in order for their arms and chest to work equally. Because of those specific body proportions, it can be a more difficult move from a biomechanical standpoint.”
Myth or fact: The bench press is only valuable as a low-rep strength-building exercise.
Davis: “Myth. It depends on your training goal and how you program for that goal. The bench press is an adaptable exercise for types of fitness goals: strength, power, muscular endurance, and hypertrophy. All of these goals require different rep ranges and tempos.”
Salvador: “While low reps with heavier weights will definitely help to build and strengthen muscles, I do believe that high reps with lower weights is also valuable. As long as the movements are still controlled, high reps can be used as a warmup and to help ingrain proper technical movement from repetition without putting too much strain on the joints.”
Would you ever recommend the ‘false grip’ for benching — yes or no, and why?
Salvador: “I would not recommend a false grip, as there is too much of a risk of the bar rolling off of the hands or hyperextending the wrist.”
Davis: “Absolutely not. It is extremely unsafe and there are no added benefits for pressing movements with a false grip — but pulling movements, like bent-over rows and pulls, yes.”
What about gloves? (Yes or no, and why?)
Salvador: “Gloves are great, especially if they have wrist wraps. Personally, I can lift more and for a longer duration of time with the support and padding of gloves. Gloves are helpful as a client starts to increase their load.”