AWS Storage Blog
Back up your Microsoft 365 estate with Veeam and Amazon S3
Users of productivity software and collaboration services such as Microsoft 365 want to protect their data and often tell us that data durability is one of their highest priorities. With the recent increases in reported cyber incidents, increasing data resilience against threats such as ransomware and other events that may compromise data durability is key. Backup operations are a critical element in designing for business continuity and mitigating the impact of said events, so you may have heard of the industry-standard 3-2-1 backup rule: keep 3 copies of the data, stored on 2 different media types, with 1 being offsite. You can extend this to the 3-2-1-1-0 rule: 1 of the copies should be offline or immutable and the backups should be repeatedly verified to have 0 errors.
You can use Veeam Backup for Microsoft 365 (VB365), offered by AWS Partner Veeam Software, to back up your Microsoft 365 estate to Amazon S3. This provides an independent layer of protection if data corruption or data loss occurs, and provides an option to use immutable (write-once read-many) and logically air-gapped storage for backup copies with S3 Object Lock.
In this blog post, we will walk through the steps to deploy VB365 on AWS. This includes setting up networking and AWS Identity and Access Management (IAM) infrastructure in AWS, an Amazon EC2 instance to host the backup appliance, and an Amazon S3 bucket to store the backup data independently of your Microsoft 365 infrastructure. This will allow you to store one or multiple additional copies of your Microsoft 365 data, using separate storage infrastructure with immutability and error checking.
Infrastructure overview
The presented infrastructure takes into consideration the components necessary for the deployment of VB365 in AWS, as described in the “Planning and Preparation” section of the Veeam Backup for Microsoft 365 7.0 in AWS Deployment Guide.
We are deploying the VB365 server into a single public subnet in an Amazon Virtual Private Cloud (VPC). Using a public subnet allows the Veeam server to have direct access to the internet to communicate with Microsoft 365 for backups – this avoids the data processing costs of a NAT Gateway. However, having the Veeam server in a public subnet means it could be exposed to incoming internet traffic if not properly secured. It is crucial to restrict access to the Veeam server by putting it in a security group with tight rules that only allow inbound traffic from your designated admin workstations’ IP addresses over the necessary ports. This guide helps you deploy this best practice configuration. If you want to log the IP traffic within your Amazon VPC, then choose to enable VPC Flow Logs.
You may prefer to deploy the Veeam server in a private subnet for increased security and isolation. A private subnet does not have direct internet access. If you want to use a private subnet, then you would also need to deploy a NAT Gateway in a public subnet, and route traffic from the private subnet through the NAT Gateway to reach the internet. The NAT Gateway allows outbound internet access for resources in the private subnets, but it does not allow inbound internet traffic directly to those private resources. This provides an additional layer of security. If your organization requires that backup servers such as Veeam are not publicly routable, then deploying in a private subnet with a NAT Gateway is a good architecture option. The tradeoff is that a NAT Gateway is an additional AWS resource that carries an hourly cost as well as price per GB of data processed.
VB365 supports client-side encryption using the AES-256 encryption standard. The objects uploaded to Amazon S3 are encrypted at rest, and you can also apply a default server-side encryption configuration to an S3 bucket to add an extra layer of encryption with AWS Key Management Service (KMS) keys that you control (SSE-KMS).
All in all, this infrastructure includes the creation of the following resources in your AWS account:
- EC2 Key Pair.
- VPC subnet, internet gateway (IGW).
- AWS IAM resources containing only the permissions needed to use Amazon S3 object storage as a target for backup and backup copy jobs, as recommended by Veeam. You can choose whether to deploy the permissions necessary to use an archiver appliance.
- AWS Secrets Manager secret containing the access keys for the deployed IAM User.
- S3 general purpose buckets:
- Bucket to store the actual backups.
- Separate bucket for storing server access logs for the backup bucket.

Setting up the infrastructure
In this section we walk you through deploying the AWS infrastructure required for VB365.
Prerequisites
Before continuing with this guide, you need the following resources.
- An AWS account
- Sign up for an AWS account by following steps outlined in AWS Account Management Reference Guide.
- Administrative IAM User
- When you sign up for an AWS account, an AWS account root user is created. The root user has access to the AWS services and resources in the account. As a security best practice, create an administrative user in IAM Identity Center, and use only the root user to perform tasks that need root user access.
1) Deploy the VB365 infrastructure CloudFormation stack
To simplify the process of deploying the AWS infrastructure required for VB365, we deploy an AWS CloudFormation stack. A CloudFormation stack is a collection of resources, defined as code (this is Infrastructure-as-Code, or IaC), which you can manage as a single unit. CloudFormation allows you to model, provision, and manage CloudFormation stacks, and thus simplifies management of your AWS resources. The following resources are deployed in your AWS account and Region via the AWS CloudFormation template:
- Security: EC2 Key Pair, IAM User, IAM User’s Access and Secret Keys, IAM Group, IAM Policy, a secret in Secrets Manager.
- Networking: VPC, public subnet, IGW, Route Tables, Network Access Control List.
- Storage: Two general purpose S3 buckets.
By selecting the following button, you are redirected to the CloudFormation console in your AWS account.
![]()
1. Select the preceding launch stack button, which takes you to the CloudFormation console. Before continuing, change the AWS Region using the button in the top-right. If you aren’t sure which AWS Region to use, see the blog “What to Consider when Selecting a Region for your Workloads.”
2. In Step 1 – Create stack select Next.

3. In Step 2 – Specify stack details:
a. In the Stack name section, enter a stack name, for example: “vb365-infrastructure”.
b. In the Parameters section, in the CreateArchiverPermissions select field, you can choose if you want to give Veeam permission to deploy an archiver appliance (these are least-privilege permissions as recommended by Veeam). The archiver appliance is used only for backup copy jobs, and it reduces the load on your primary backup server when a backup copy is running. Choose Yes if you would like to use a Veeam archiver appliance, or No otherwise.
c. Select Next.

4. In Step 3 – Configure stack options there’s no need to make any changes. Scroll down to the bottom of the page and select Next.

5. In Step 4 – Review and create:
a. Review the stack details.
b. Select the checkbox at the end of the page that says I acknowledge that AWS CloudFormation might create IAM resources with custom names.
c. Select Submit.

Once the stack is successfully created, its status changes to CREATE_COMPLETE. This usually takes a minute or two.
2) Install VB365 from AWS Marketplace
In this section, follow the deployment instructions provided in the VB365 from AWS Marketplace deployment guide. Subscribe to the BYOL VB365 offering in AWS Marketplace. This process allows you to deploy the CloudFormation template that defines the remaining resources needed to run the VB365 in your AWS account. This primarily includes an Amazon Elastic Compute Cloud (EC2) instance to run the VB365 software.
Make sure you select the same Region used in the CloudFormation deployment section of this blog post above to deploy the AWS infrastructure needed for VB365. After you subscribe and configure the product through the AWS Marketplace, you are redirected to the CloudFormation console and asked to fill in some parameters necessary to proceed with the installation of VB365.
When you get to Specify stack details, you must refer to some of the resources created in the CloudFormation deployment section of this blog (the prior section). They are:
1. Instance configuration
a. Most users should select the m6i.2xlarge instance type, as recommended by Veeam.
b. In the Key Pair for Veeam Backup for Microsoft 365 field, select vb365-keypair from the list.
2. Network configuration
a. Make sure to select true for Create elasticIP for Veeam Backup for Microsoft 365?.
b. In Allowed Source IP Addresses for connection to RDP, you need to add IP addresses in a CIDR format (such as 12.23.34.45/32), which you use to connect to the VB365 instance over Remote Desktop Protocol (RDP). Following the principle of least privilege, we recommend reducing the attack surface of your environment by exposing the absolute minimal set of ports to the network while also restricting the source network or IP address that has access to your VB365 instance. To limit the access to only your IP address, you can check your IP address here. If you wish to use AWS Systems Manager Fleet Manager to connect to your instance instead of a direct RDP connection, then you can specify 0.0.0.0/32 here to deny the incoming connections.
3. VPC and Subnet
a. For VPC, select VB365-VPC from the list.
b. For Subnet, select Vb365InfraStack/VpcResources/VB365-VPC/VB365-PublicSubnetSubnet1 from the list.
Now you are ready to follow the next steps in the deployment guide to deploy VB365 from AWS Marketplace.
3) After you install VB365
After the VB365 from Marketplace is installed (second CloudFormation stack status changed to CREATE_COMPLETE), you must connect to the VB365 instance over RDP. In the next steps, you retrieve the private key content needed to access the VB365 server, connect to the server using RDP, and configure VB365.
Getting Key Pair content
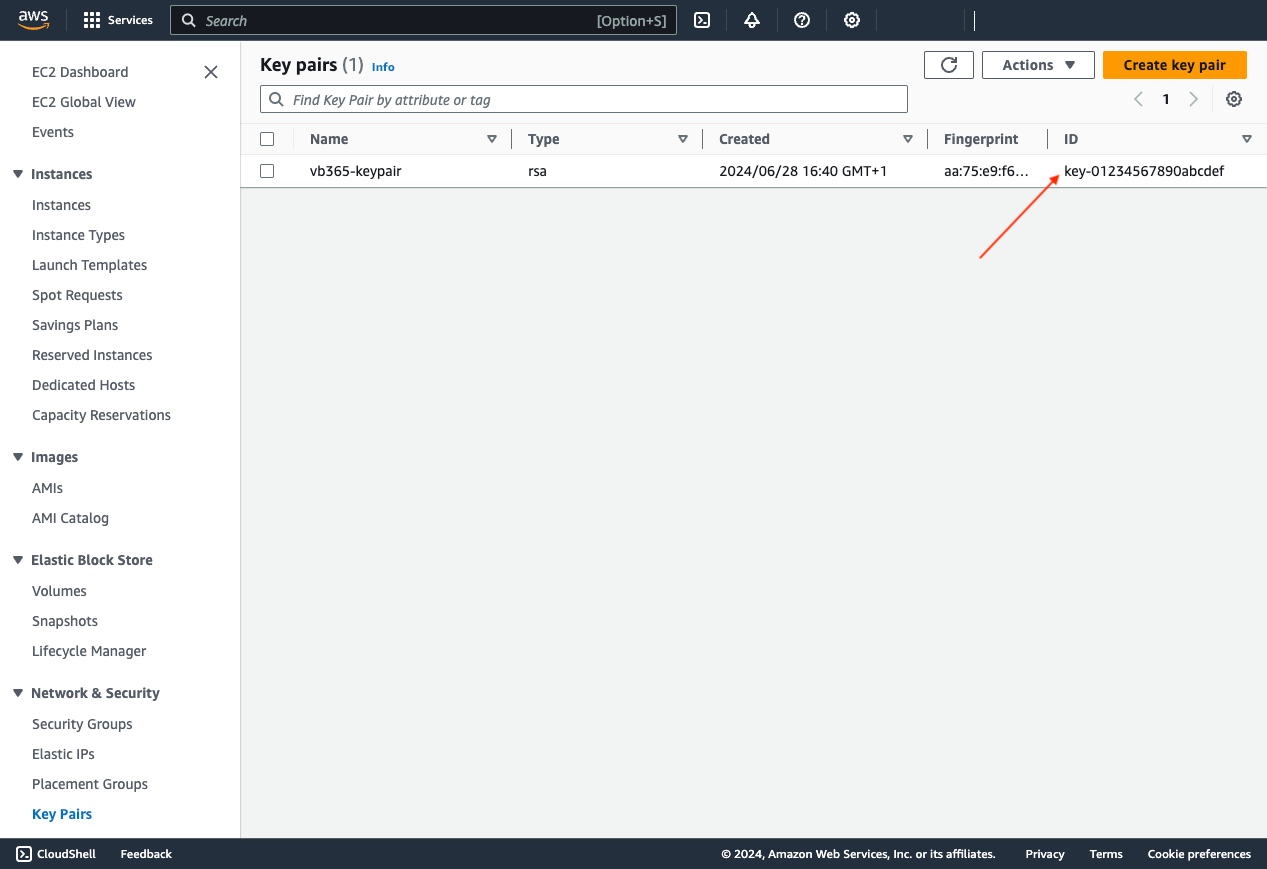
1. Access the Amazon EC2 console and select Key Pairs on the left-side menu under Network & Security.

2. Copy the value of the ID column for the key pair you are looking for (vb365-keypair). The value looks like key-01234567890abcdef.
3. In another tab, access AWS Systems Manager.

4. On the left-side menu, select Parameter Store under the Application Management section.
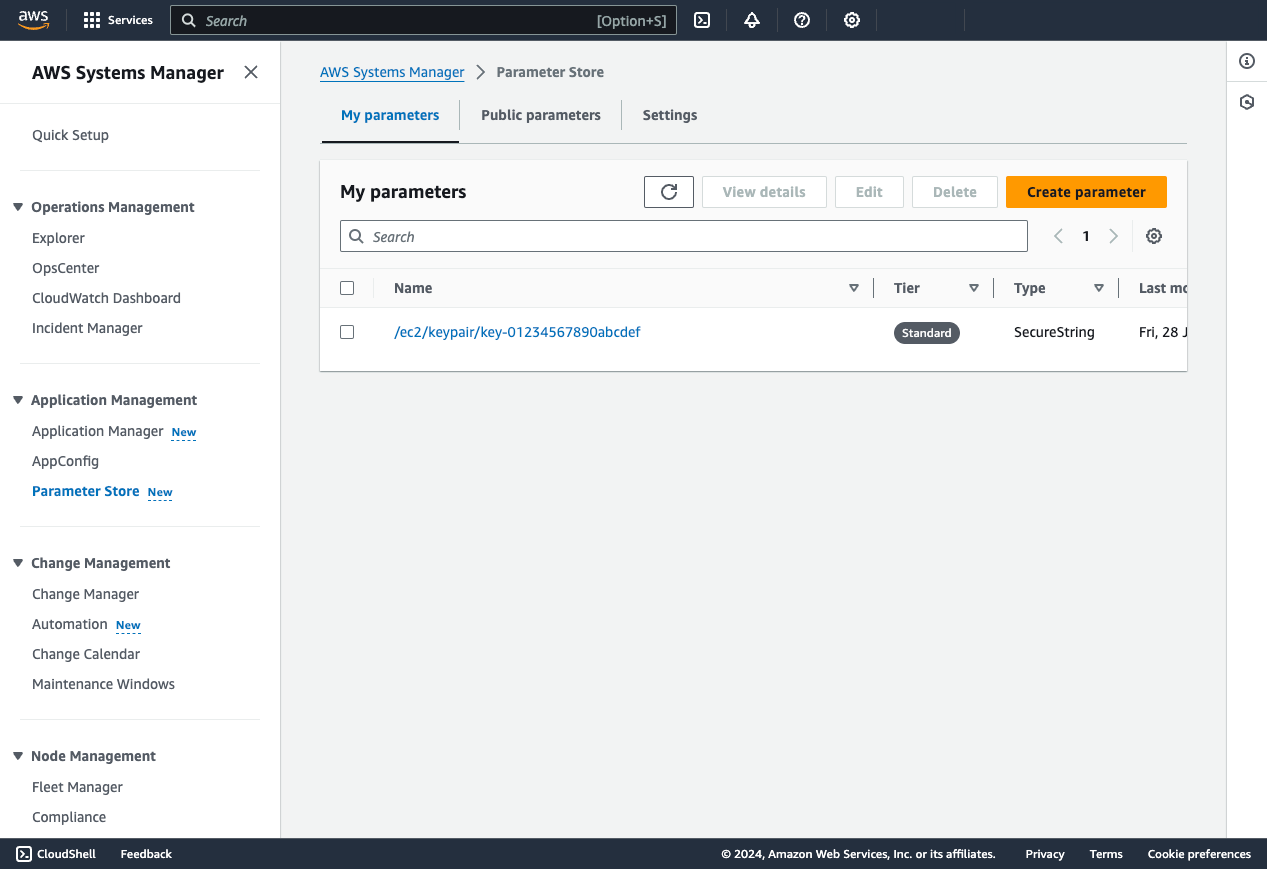
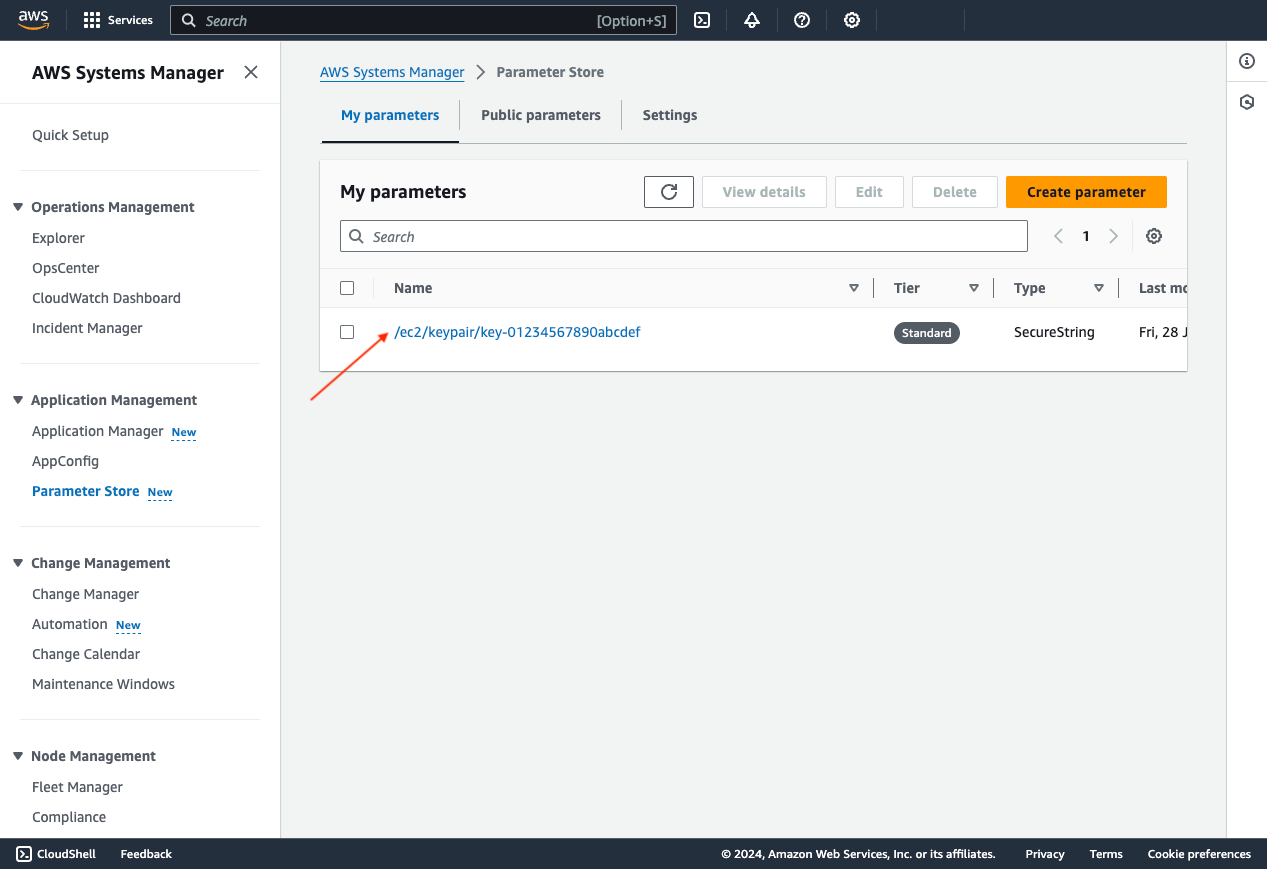
5. Search for the parameter that starts with /ec2/keypair and matches with the key ID you’ve got in the previous steps. It should be like: /ec2/keypair/key-01234567890abcdef. Select it.
6. In the Overview tab, select Show decrypted value to see the value for this key.
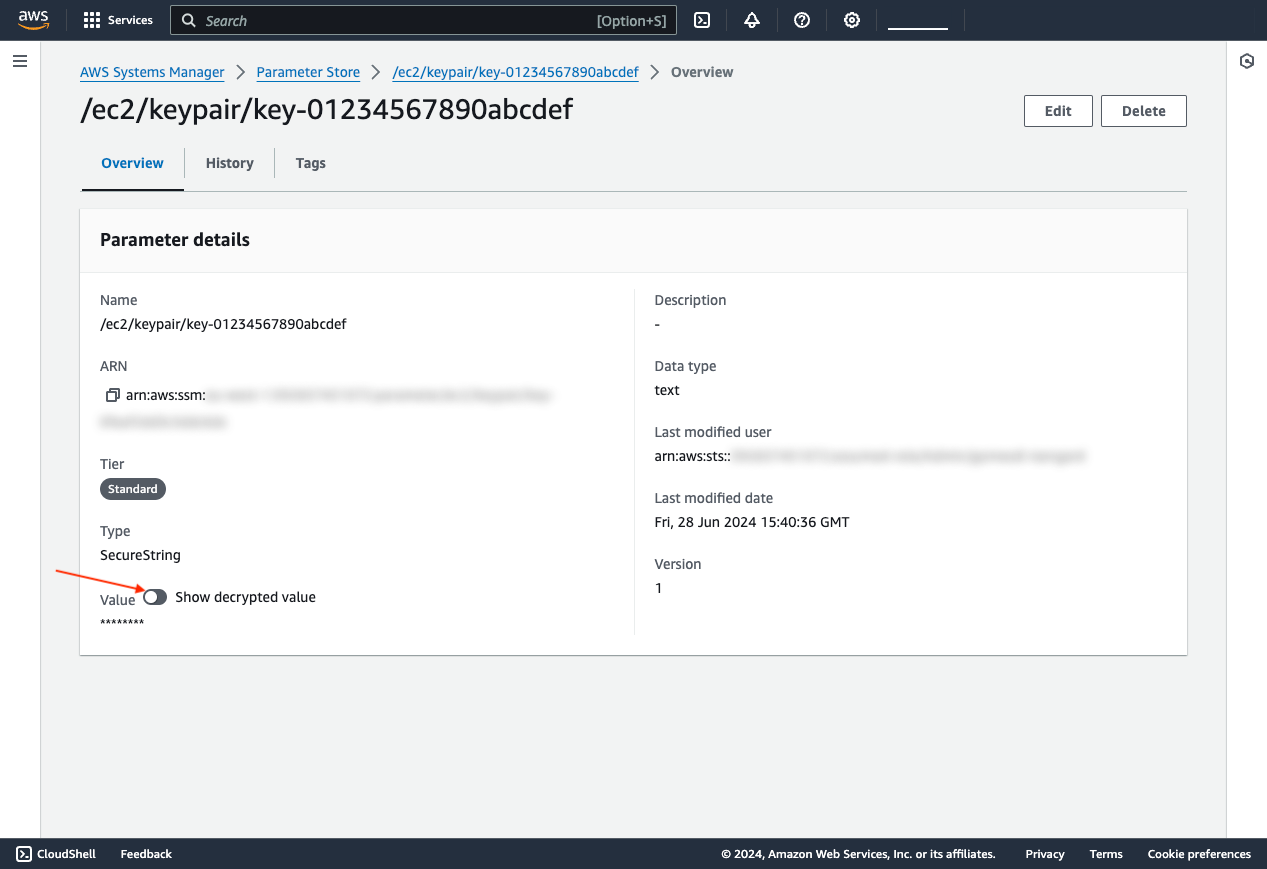
7. Copy the text from -----BEGIN RSA PRIVATE KEY----- to -----END RSA PRIVATE KEY----- inclusive. This is the private key you need to decrypt the password to access the VB365 instance.
Connecting to the VB365 server with RDP
In this section, you access the VB365 server instance using RDP. You could also use AWS Systems Manager Fleet Manager’s Remote Desktop capability to connect to your instance without opening inbound ports (not covered here).
1. Access the Amazon EC2 console.
2. On the left-side menu, under the Instances section, select Instances.
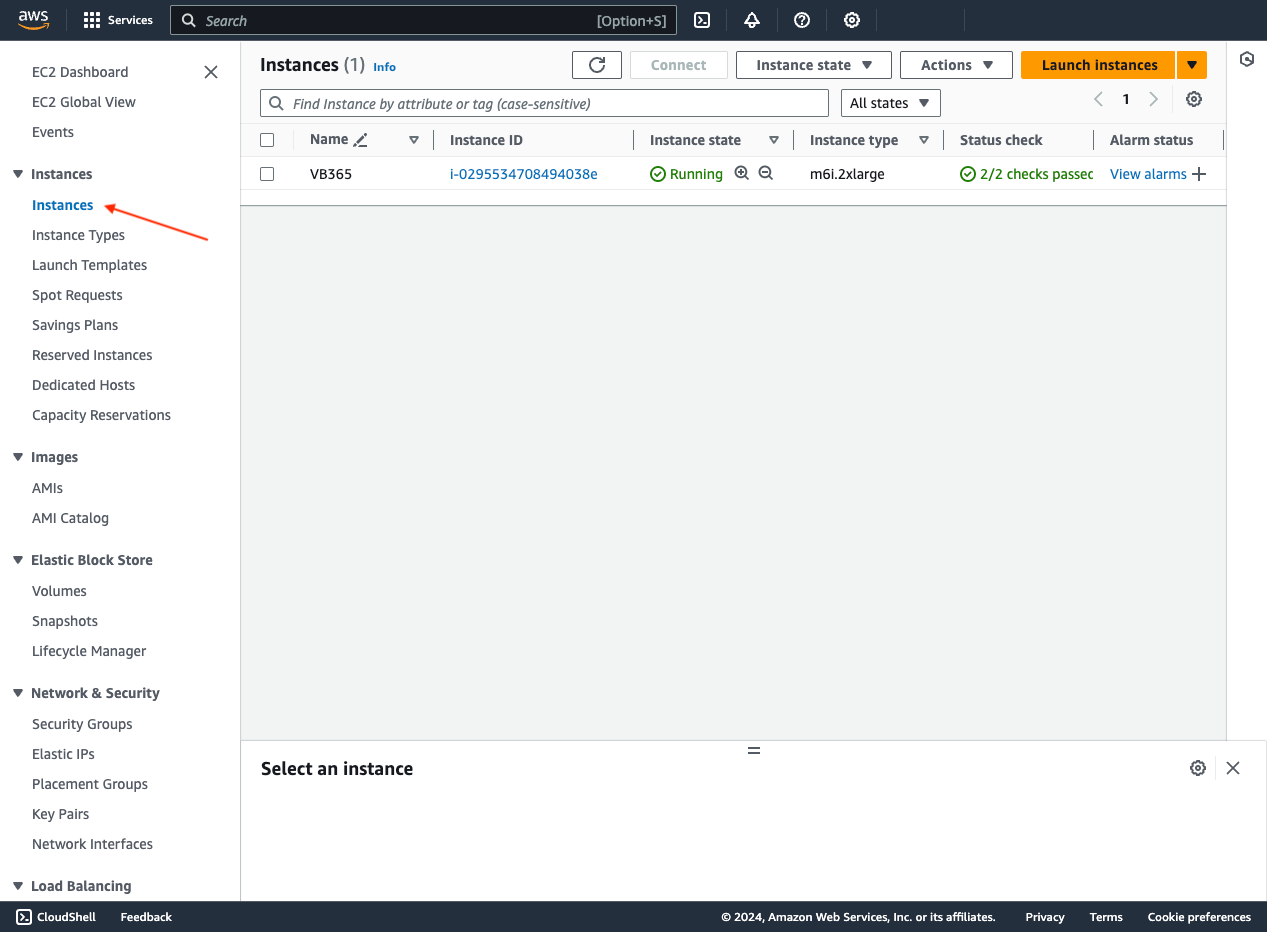
3. Search for the instance with the name that matches the stack name you selected when deploying Veeam Backup from AWS Marketplace and select the checkbox related to that instance.

4. Select the Connect button in the menu before the list of instances and choose the RDP client.

5. Select the Get password link, paste the private key content you copied earlier from the Parameter Store, select Decrypt password, and copy the displayed password.

6. Select the Download remote desktop file button to download the preconfigured RDP connection file.
7. Open the RDP connection using the downloaded file and use the copied password to log in to the Veeam instance. You might get a warning that the publisher of the remote connection is unknown. Choose Connect to continue to connect to your instance. Note: Due to the nature of self-signed certificates, you might get a warning that the security certificate could not be authenticated. Follow the steps outlined in the documentation on connecting to your Windows instance using RDP guide if you want to verify the identity of the remote computer.
You are now logged in to VB365 instance. After connecting to the Windows server that hosts VB365, it is important to check for available security updates from Microsoft and install them. Keeping the Veeam Backup server’s operating system (OS) patched and up-to-date is a crucial part of maintaining a secure backup infrastructure. Additionally, check the Veeam website and documentation to see if new patches or hotfixes for Veeam Backup & Replication have been released recently. Install Veeam patches and updates as well to keep the backup software up-to-date.
Configuring VB365
You may now proceed with the remaining steps presented in Veeam’s deployment guide to configure your VB365 installation. VB365 needs a valid license if you plan to back up more than 10 users’ accounts, more than 1 TB of Microsoft SharePoint data, or more than 10 teams in Microsoft Teams. You can purchase licenses from the AWS Marketplace by selecting the Backup for Microsoft 365 purchase option from the Veeam Data Platform product.
Once you’ve completed the post-installation steps, you can continue configuring your Veeam Backup installation following the configuration section of the Veeam documentation and proceed to adding and configuring Amazon S3 object storage.
When configuring your Veeam Backup instance with Amazon S3 as described in the Veeam documentation, you’re asked to provide AWS account credentials to connect to the S3 storage bucket. The first CloudFormation template you deployed created the IAM User and stored its credentials in Secrets Manager.
Follow these steps to retrieve them:
1. Access the Secrets Manager console – make sure you are in the Region you selected for your Veeam infrastructure and deployment.
2. Select the VB365-IAM-User-AccessKeys secret name.
3. In the Overview tab under Secret value, select the Retrieve secret value button.
4. Copy the Secret value for AccessKeyId and SecretAccessKey.
5. Use those values when configuring AWS credentials in your Veeam server.
While configuring your storage options we recommend that you choose the Amazon S3 Standard-Infrequent Access storage class. This storage class offers a balance of storage and request costs that is well suited for this use case. If you want to store archival backup copies in low-cost storage, then you can use S3 Glacier Deep Archive (a cost-effective archival storage with a 12h retrieval time).
Cleaning up
To avoid incurring ongoing charges, and if you want to delete everything deployed in this post, follow the steps to delete a stack on the CloudFormation console to first delete the stack from the AWS Marketplace and then delete the infrastructure stack from this post.
Note that the S3 buckets are retained and not deleted during this process. If you don’t need them, then make sure you empty and delete them manually though the Amazon S3 console.
Conclusion
In this post, we covered how to set up the AWS infrastructure necessary to install Veeam Backup for Microsoft 365 from the AWS Marketplace to have an offsite backup of Microsoft 365 data using AWS storage services. We walked through how to deploy the supporting networking an IAM infrastructure and how to launch the software from the AWS Marketplace. Finally, we explained the post-deployment steps required to configure VB365 and how to clean up the infrastructure if you wish to delete everything. We described how to deploy VB365 with a BYOL (Bring Your Own License) licensing model – you can purchase licenses from the AWS Marketplace.
Following the guidance in this post will ensure you have an off-site backup of you VB365 data, allowing you to improve your data resilience against ransomware and other threats. By using Amazon S3 with VB365 you can have immutable copies of your business data in an offsite backup, aligning to the 3-2-1-1-0 rule for backups.
Thanks for reading this post. For further reading, we invite you to dive deep into the Backup & Restore options on AWS as well as into Cloud Storage on AWS.