| マットレスの厚さ | 1.75 インチ |
|---|---|
| 互換性のある最小の厚さ | 1.25 インチ |
| 重量制限 | 20 ポンド |
| UPC | 860050000975 |
| メーカー | Purrfect Portal |
| 型番 | Meow_Manor_v2 |
| 梱包サイズ | 25.9 x 25.6 x 7.6 cm |
| 梱包重量 | 0.62 キログラム |
| 電池使用 | いいえ |
| 電池付属 | いいえ |
| ブランド名 | Purrfect Portal |

類似商品と比較する
この商品  Purrfect Portal インテリアキャットドア - フラップなし キャットドア インテリアドア 最大20ポンドまでの猫用 簡単DIY設定 数分で取り付け トレーニング不要 |  |  |  | |  | |
| 価格 | ¥8,736 | ¥1,699 | ¥2,399 | -20% ¥1,599 過去: ¥1,999 | ¥1,899 | ¥1,999 |
| 配達 | 8月 7 - 14 日にお届け | 最短で8月7日 水曜日のお届け予定です | — | 最短で8月7日 水曜日のお届け予定です | 最短で8月7日 水曜日のお届け予定です | 最短で8月7日 水曜日のお届け予定です |
| お客様の評価 | ||||||
| 耐久性 | ||||||
| ロック機能 | ||||||
| 接着力 | ||||||
| 軽さ | ||||||
| 透明感 | ||||||
| 販売元: | AISON EU | YcozyDirect | Petleso | Enjoying-JP | YcozyDirect | YcozyDirect |
| サイズ | Original | M | 内寸16*15cm | 通行寸法18*18.5cm | — | L | 内寸20*19cm | L | 内寸20*19cm |
| 留め具タイプ | フラップ。 | — | マグネット | スナップ | — | — |


イメージ付きのレビュー


取り付けてよかったです
他の購入者が開封して返品したであろう開封済み商品が届きました。箱は破れ、手垢ベタベタだったので返品しようか迷ったのですが、返品せず使用しています。説明書は英文ですが読まなくても作業できました。DIYなどしたことないので、ノコギリ、ドライバーしか道具がなく、ドアを切る作業は難しく大変でした。とくに、上部のアーチのところが。でもドアを切ってしまえばあとは+のドライバーがあれば取り付けるのは簡単でした。電動工具が欲しいと思いました。4キロの成猫ですが、余裕で通れます。ドアを閉めても、勝手に出入りしてくれるので、取り付けてよかったです。
上位レビュー、対象国: 日本
レビューのフィルタリング中に問題が発生しました。後でもう一度試してください。


2022年8月8日に日本でレビュー済み


サイズ: Original色: ホワイト
海外からだったので、名前や住所が異なり、運送会社から確認の電話が来て受け取ることが出来ました!
予想以上に可愛い!!
うちの子はおデブちゃんで初めは心配したけれど、通る事が出来て安心しました!
取り付けの際、扉外して、型紙通りに切ればOK!あとはネジ取り付けて完成!
意外と女の私でも簡単だった!
私的にとてもおすすめ♡
大満足!!♥Thank you♥
予想以上に可愛い!!
うちの子はおデブちゃんで初めは心配したけれど、通る事が出来て安心しました!
取り付けの際、扉外して、型紙通りに切ればOK!あとはネジ取り付けて完成!
意外と女の私でも簡単だった!
私的にとてもおすすめ♡
大満足!!♥Thank you♥
このレビューの画像

2023年3月4日に日本でレビュー済み


サイズ: Original色: ホワイト
所要時間は1時間半程(5分ほどの休憩あり)
使用した工具はノコギリとプラスドライバー、紙やすりを使いました。インパクトドライバーがあると尚良し!という感じです。とても可愛く仕上がりも綺麗にできました!
しかし、取説が全て英語表記の為写真を見て順を追って作業を進めました。
使用した工具はノコギリとプラスドライバー、紙やすりを使いました。インパクトドライバーがあると尚良し!という感じです。とても可愛く仕上がりも綺麗にできました!
しかし、取説が全て英語表記の為写真を見て順を追って作業を進めました。
このレビューの画像


2024年6月5日に日本でレビュー済み


サイズ: Original色: ホワイトAmazonで購入
他の購入者が開封して返品したであろう開封済み商品が届きました。箱は破れ、手垢ベタベタだったので返品しようか迷ったのですが、返品せず使用しています。
説明書は英文ですが読まなくても作業できました。
DIYなどしたことないので、ノコギリ、ドライバーしか道具がなく、ドアを切る作業は難しく大変でした。とくに、上部のアーチのところが。
でもドアを切ってしまえばあとは+のドライバーがあれば取り付けるのは簡単でした。
電動工具が欲しいと思いました。
4キロの成猫ですが、余裕で通れます。
ドアを閉めても、勝手に出入りしてくれるので、取り付けてよかったです。
説明書は英文ですが読まなくても作業できました。
DIYなどしたことないので、ノコギリ、ドライバーしか道具がなく、ドアを切る作業は難しく大変でした。とくに、上部のアーチのところが。
でもドアを切ってしまえばあとは+のドライバーがあれば取り付けるのは簡単でした。
電動工具が欲しいと思いました。
4キロの成猫ですが、余裕で通れます。
ドアを閉めても、勝手に出入りしてくれるので、取り付けてよかったです。
このレビューの画像

他の国からのトップレビュー

Paola
Excelente compra
2024年3月9日にメキシコでレビュー済みサイズ: Original色: ホワイトAmazonで購入
Marilyn
Great looking cat door!
2024年2月25日にカナダでレビュー済みサイズ: Original色: ホワイトAmazonで購入

Yari Alsleben
Genau wie erwartet
2024年2月27日にドイツでレビュー済みサイズ: Original色: ホワイトAmazonで購入
Yari Alsleben
2024年2月27日にドイツでレビュー済み
このレビューの画像


Happy Cat
Brilliant!
2024年2月11日に英国でレビュー済みサイズ: Original色: ホワイトAmazonで購入
Happy Cat
2024年2月11日に英国でレビュー済み
このレビューの画像


DroMike
Unique and Whimsical, but Extremely Practical -- and You CAN Do it Yourself. Swear!
2021年3月27日にアメリカ合衆国でレビュー済みサイズ: Original色: ホワイトAmazonで購入
DroMike
2021年3月27日にアメリカ合衆国でレビュー済み
I just saw this on a video from the folks with Kona the Bengal. The woman was rightfully giddy about how unique and different this was, and I liked its looks and functionality immediately. PLUS, the fact that it DOESN"T have an always-present flap was perfect for my needs. Now I can keep it always open, but on those rare occasions I'll need it closed for a few minutes, I'll just shut its little door.
The extra bonus for ME, is that now -- when I might go on vacation and use a cat sitter service -- the sitter can come INTO the house from the driveway with Meow Mansion closed (while gone, I'd move the litter box into the kitchen). That way, she can come in and out with impunity and not worry about the cats squirting out --- she can have that safe buffer of closing the back door, THEN opening the interior door into the kitchen. I know that all sounds confusing, but just think of three areas (1) outside driveway with back door into laundry porch; (2) small laundry porch room with interior door into the kitchen; and (3) kitchen.
I just got the kitty door today and even though I have a ton of projects to do, really couldn't wait to install it. Now, I CAN wrench a motorcycle and can do extremely minor repairs, but these are things ANYBODY can do if they read how to do it. The installation of the Meow Mansion was even easier and I absolutely had to take a crack at it. A month or two back (in anticipation of cutting out a whole in ONE of my doors), I purchased an inexpensive jigsaw. I pulled the interior door off the hinges (one of the two pins was stuck but a hammer and screwdriver wrenched it loose). The 1 1/4" thick door was not light but it wasn't difficult to bring it to my backyard where I placed it on my covered hot tub (nice, large flat surface); but really you can probably figure out some place in your home to do it; even on a simple table if there's room).
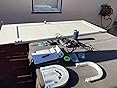
I brought out everything I figured I'd need: the paper template, scissors, tape (to tape the template to the door), a pencil, my jigsaw, a Philips screwdriver, an electric screwdriver, (then, a) drill, screwdriver bits for all, an extension cord, the Meow Mansion and screws for it, a Yeti cup of ice water and my glasses (it was a nice sunny day, mid-60s in the late afternoon). One of my four photos shows most everything I mention just a minute or so before I started.
Now, I'd uh, NEVER operated a jigsaw before, but watched a few YouTube videos, and opened the jigsaw package for the first time ever. I saw they gave me about 6 blades. I just made an educated guess which one to use, and even had to find a video of the model to see how to insert the blade. You might need two people to manhandle the door, but I did it myself -- not too heavy, just awkward. Having seen two separate installation videos, I just went for it. Cutting the paper template was easy. I tried to cut/stay in the middle of the outer black line. I then measured the width of the door and made a pencil mark at the center. I laid the template on it and taped it lightly in place away from tracing spots. I then traced with a pencil by pressing down the template and voila! I had a light but very visible line on my door.
I plugged in the jigsaw and as best I could, followed the horseshoe-like line. Happily, the jigsaw had a laser light that helped; but I still had to blow away sawdust to see. In MY case -- perhaps because I was using the wrong blade or this was my first time using a jigsaw -- instead of taking about 30 seconds to cut out the hole, it was slow going and took me, I dunno, about 4 minutes. Even though a couple of times I strayed INSIDE my pencil line, I went back and cut those parts wider (that took maybe 20 seconds). It appears that the actual Meow Mansion plastic templates give you plenty of leeway, so don't get too caught up in being 100% perfect -- just do a reasonably good job.
AFTER the hole was done, since I had an electric screwdriver I figured I was home free to emplace the 6 (3 on each side) screws onto the MM. But it was not to be. The electric screwdriver was meant for light in-home screws and NOT to start and finish screwing a wood screw into "virgin" wood. It just spun around. Well, I reasoned, I had a nice standard-sized DRILL. But I dunno, I'm no everyday driller either, and it spun around a bit, probably because I didn't think I needed to push down with force. Maybe I shouldn't have been that timid. [Editing here 2 years later it was really because I didn't drill a small pilot hole first.] Ultimately I ended up using a standard Philips screwdriver. I found you had to PUSH hard while screwing, and then they went in fine and I was able to cinch them down. So much for my hopes of just going "Wrrrrrrr" with an electric something-or-other and being done with each screw. Still, I just took my time -- maybe 2 minutes per screw. The only other hassle was completely turning the door OVER for the other side; slightly tricky, but not that difficult. After that, the instructions to emplace the little door handle holder or keeper was easy; even ingenious. You merely placed the keeper on the door handle, remove the sticky tape atop the keeper, then open the door on its hinges against the "wall," pressing the sticky part of the keeper onto the "wall." Then you carefully detached the door knob from the keeper. The keeper was then perfectly in place, and after you use the provided screw that comes with it (again, more cinching down), it is permanently in place. You're DONE!
I know this sounded like a lot. But honestly, it took me perhaps 45 minutes from gathering all the tools, removing the door to the outside, cutting the template, the door; REALIZING the electric screwdriver wouldn't work and obtaining my drill and hooking THAT up; failing with that, THEN screwing the MM down manually; and finally placing it back on its hinges and taking photos.
The bottom line is, this thing is cute as a button, a good size for just about any cat I'd think; can act as a kitty pass-through OR a blocking mechanism to another room, and was not difficult for someone who at least knows about a few basic home tools (hammer, pliers, some wrenches, that type of thing). Once it's finished there is a lot of joy in knowing you've made life easier and safer for you and your warm, furry friends -- oh, and your kitties too! haha I highly recommend this wonderful cat door!!
このレビューの画像